Showing posts with label Plastidip. Show all posts

Friday, December 16, 2016

Plastidip Removal from Porsche Wheel - NO CHEMICALS!

Earlier this year I decided to switch the color of my wheels back to the original platinum satin finish that the car came with.  As you may know from my previous posts and videos (check out my You Tube channel:  GTSilver for this and many other Porsche DIY videos!) I sprayed my factory wheels with matte black Plastidip a while back.  Absolutely loved it!

So I captured the 'dip removal process.  In a previous post (check it out:  http://plenums.blogspot.com/2015/12/plastidip-removal-991-c4s-rear-wheel.html  I did a "refinish" of one of the wheels that needed touch-up after a tire swap, but in that case I tried couple of different techniques.  This time, I decided to forgo the chemicals and attempt a full removal with just my fingers / elbow grease!

Getting right to it, here is the video, out on my YT channel GTSilver:


I say it throughout the video, and I'll repeat it again here:  the amount of effort to remove the dip from a wheel is directly proportional to how thick and evenly you applied the spray in the first case.

Anyway -- thanks for visiting!  Please subscribe to my email update list, as well as my You Tube channel GTSilver!

Thursday, December 24, 2015

Plastidip Touch-Up: 991 C4S Wheel

As posted in my "Removing Plastidip" post, I am also touching-up the other three wheels on my '14 991 C4S.  Mounting snow tires for the NE winter caused some of the matte black dip on my 20" wheels to pull-up.  Although in the previous post I was stripping the Plastidip from the wheel before respraying, I only needed to do that for the single wheel.  The other three wheels had only minor pulls or rips in the black dip coating -- so I chose to clean the wheel up and respray.

This video (a bit better quality this time!) captures the process I followed to get each wheel back to "new".

Appreciate any feedback / comments!

Plastidip Touchup and Respray


For the previous post, check out:  Removing Plastidip from 991 C4S Wheel

Wednesday, December 23, 2015

Plastidip Removal: 991 C4S Rear Wheel

I posted a (lame...) DIY video over on my GTSilver YouTube page:


The Background:

Short story is that I have had my '14 Carrera Classic wheels painted with matte black Plastidip for about a year now.  I just had new tires installed, and the process of doing so pulled some of the 'dip off.  The drivers side rear was in the worst shape and I decided to strip the whole wheel face and reapply.  The other three just needed minor touch-ups and a respray.

I am loving this stuff...  Even with harsh weather of all kinds, and many washings, the Plastidip on the wheels has held-up extremely well.  I had one small instance months back where I had a "chip" in the "dip", and that was easy to fix without refinishing or painting the whole wheel.

I'll post another vid and more on the touch-up process later....

I have never removed Plastidip before, so went into this project with my fingers-crossed.  I found tons of videos and online descriptions about painting wheels with dip, but very little on removing.  So I decided at the last second to record my work on video, using my iPhone 4S.  I know, the quality is crappy, and editing is very poor.  I'll work on improving as I do more videos.

Removing Plastidip from Wheel:

The video is self-explanatory.  I start-out peeling by hand, then try a heat gun, then WD-40.  All worked, with the WD-40 being very effective without any harm to the underlying wheel finish whatsoever.  While the peeling by hand method works, and applying heat made peeling a bit easier, the WD-40 method was super effective and I probably should have started there.

Totaling the time I spent stripping, cleaning, and respraying this one wheel I realize it is not a "quick" process.  I believe I spent several hours just getting to a point where I was applying new dip.  But this was my first time, and I was experimenting (and trying to video with one hand and work with the other), so I don't think next time it will take me nearly as long.


As I was starting the respray, my phone memory hit a wall, so the video abruptly cuts off...  but you aren't missing much.  I applied something like 7 coats, going heavy as I want the next time I have to strip the dip to be easier.

Happy to answer questions, provide more details if it would help you!  Just reply / comment on the video or this post.

Thanks!


Wednesday, March 11, 2015

DIY: Porsche 991 911 C4S Roof Wrapping


Some time back I decided to add some unique style to my 2014 911 GT Silver C4S.  Among other things, I changed the chrome accents / badging to matte black, changed the headlights out to OEM Black PDLS units, changed the entire exterior mirror assemblies to matte black, and so on.

Additionally, I decided to change the entire roof to matte black, using vinyl wrapping material.  I didn't get a good set of pictures throughout the installation process, but will post here what I do have...

I chose to use a 3M 1080P product, which for those of you who aren't familiar is an automotive vinyl wrapping material that is very durable, easily installed, and completely removable without negatively impacting the OEM painted surface.  I had read a ton of articles on vehicle wrapping, and my opinion is that 3M manufactures one of the better-quality, "higher-end" materials for wraps.

I ordered the vinyl material online from a reputable 3M vinyl supplier, along with some basic application tools such as surface prep, squeegee, and blades.  I don't remember the exact cost, but I think for the surface area I am dealing with I spent about $75.

Here's a "before" picture - not the best view, but clearly shows the three sections of the roof that I had to deal with in my case (obviously, is you have the 'no-sunroof' option, you will only have one large surface to cover....).
My '14 C4S roof includes the metal sunroof panel, so my roof is 3 separate areas.
To get started, make sure the  car is very clean, focusing on the surface area you are going to cover.   I did my usual wash routine, then used some cleaning solution to thoroughly remove any oils, grease, wax or other residues from the surface.  If your car roof is "dirty" you may also want to clay bar the surface -- in my own case I didn't feel this was necessary as the surface felt very smooth and "slippery" to the touch.  Wouldn't hurt to clay anyways, but I decided not to.

You should also make sure to get the area completely dry, paying attention to the areas where moisture might remain for an extended period, such as around the weatherstripping....  I used a air hose from my compressor to blow the water out of the cracks around the area.

 The next step -- and although some may feel this is not necessary -- is to remove any exterior trim, which in my case meant the weatherstripping / rubber gaskets that run along the roof edge as well as around the metal sunroof on my car.  I found that the stripping is actually 5 separate parts -- there is a single 'box' of weatherstripping surrounding the sunroof panel, as well as 4 smaller segments - 2 on each side, front and back, where the stationary sections of the roof meet-up.

I started with the rubber stripping around the sunroof.  I found that this is a single large / continuous rubber piece, a square...  I opened the sunroof, and began at a corner.  Gently pull the rubber up and it should start sliding off as you work around the perimeter of the sunroof.

Start pulling-up at the corner of the sunroof panel.
Be careful, and try not to stretch the rubber too much.  It does deform, but you can totally reuse this piece as I'll mention later.  I am not sure what the price is to replace, and it shouldn't be too bad, but if you are careful and take your time you shouldn't have to worry about it.

Pull-up carefully around the perimeter of the sunroof.
Once I had the rubber gasket removed, I found a nice safe place and put it aside.  I then turned to the 4 smaller rubber strips at the front and rear of the "side rails" along the roof.  Note that this is also the area where you would install the footings for a roof rack.  At first I was thinking that these rubber pieces would come off similar to the rubber running around the sunroof.  But that was not the case....

These rubber sections are anchored much more "permanently" than the sunroof gasket, and in fact I can confirm that these are intended to be replaced entirely upon removal.  I confirmed by looking-up the Porsche PIWIS official workshop manual article.  That would be "WM 605419 Removing and installing seal for roof assembly" for those that care....

You gently pull-up on one end of the rubber seal, and then you'll have to cut-off and remove any plastic bits that remain.  So, I didn't do this!  LOL.  I was worried about cutting something important, so I merely pulled the piece up and positioned out of the way while I worked in that area.

Red arrows indicate front of roof above windshield where I pulled-up the rubber weather stripping.
Each of the strips pull-up at one end, but are secured in place by a plastic fastener that unless you do want to clip off and replace you should take care to not tear or deform.

This is a close-up of the rear roof area, just above rear window...
With that taken care of, I again made sure all moisture was removed from the areas where the rubber gaskets are.

My next step was to lay-out some knife-less tape where I wanted to trim and tuck the black vinyl.  The piece of vinyl was already the best size -- that being a 5' x 4' single sheet.  I decided to use the knife-less tape so that I could avoid any risk of putting scratches in the paint around the roof when trimming the vinyl to three sections.
This method is also great if you don't want to remove the rubber gaskets...
Make sure to leave enough tape sticking-out so you can easily grasp and pull once the vinyl is down.

Make sure to overlap the tape so that you can "cut" the longer
side rails first, then the perpendicular shorter sides second.
Once all the tape is laid-out, you can get ready to place the vinyl.  Unfortunately I did not keep the pictures I snapped while working on this part of the project.  Sorry!  I'll do my best to describe the effort....

If you ever watch the thousands of YouTube videos out there for vinyl wrapping, you'll notice that in most cases roof wraps are put in place by at least two guys, maybe more.  But I am here to tell you that you can do it with a single person, or one set of hands!

I took the vinyl piece, and leaving the backing-paper in place laid it out over the roof.  I then started at the front and pulled the backing half-way towards the rear of the roof.  I pressed-down in a couple of spots near the middle.  As I did this, I began moving my squeegee evenly around the vinyl in a center to front pattern to firmly set the vinyl in place.  I continually worked the squeegee to remove any bubbles or wrinkles from the vinyl, progressively pressing more firmly as I worked the entire area.

Once I felt that I had done enough on the front-half, I reached under and pulled the remaining backing off.  I then started near the center of the roof and while pulling the vinyl taught towards the rear windows began working the squeegee to press the vinyl onto the roof.

I have to say that this was a really simple procedure once I got going.  Just take your time, hold the squeegee at the right angle to the surface and pay attention to detail!  I spent maybe 45 minutes tops getting the vinyl down.  In comparison, I spent nearly two hours prepping for this moment!

Once I finished, I let the surface rest for a bit.  Had a beer, or two.  I then went to the knife-less tape "ends" and started firmly pulling to create my cut lines.  This was a bit tricky at first, but you just have to firmly yank the sting to get the first cut line started.  If you laid-out the tape correctly, you should have a very nice straight line following the gaps around the sunroof and rails.  You can go back around and just yank the tape remnants out from under the vinyl.  This is easy....

Next step is to begin tucking the edges of the vinyl wrap down into the sides of the sunroof / roof panels.  If you've removed the weather stripping / rubber gaskets, this is very easy.  Just take your teflon squeegee and fingers and firmly push the edges down.  If you've cut properly, there should be plenty of material to attach so you won't have any edges exposed to the elements.  You could also use an edge sealing fluid to more firmly bond the edges to the roof, but I felt that tucking the edges under the weatherstripping should be sufficient.

Here's a pic of the front section after I've tucked the vinyl and replaced the rubber strips...


Follow the same to complete all edges around the roof, and replace any weatherstripping once you are satisfied you have a good bond at the edges.

Boom! You are done!  If all went smoothly, you should have a great-looking wrapped roof panel!
This is an "older" after-shot back in warmer weather and before
I changed to the black mirrors....
Next up?  I am going to wrap the frunk hood in either same matte black or may try something very different and go with a matte blue metallic!  

Thanks for reading!!!

Friday, January 23, 2015

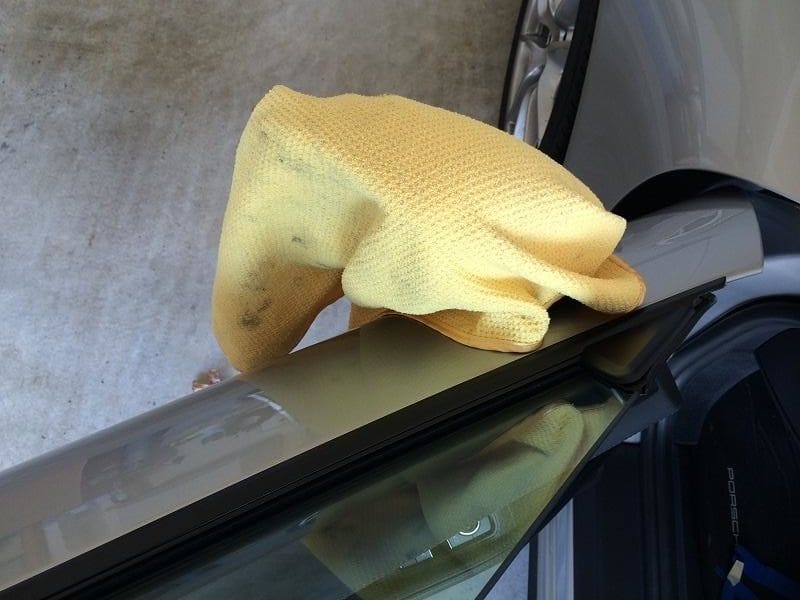
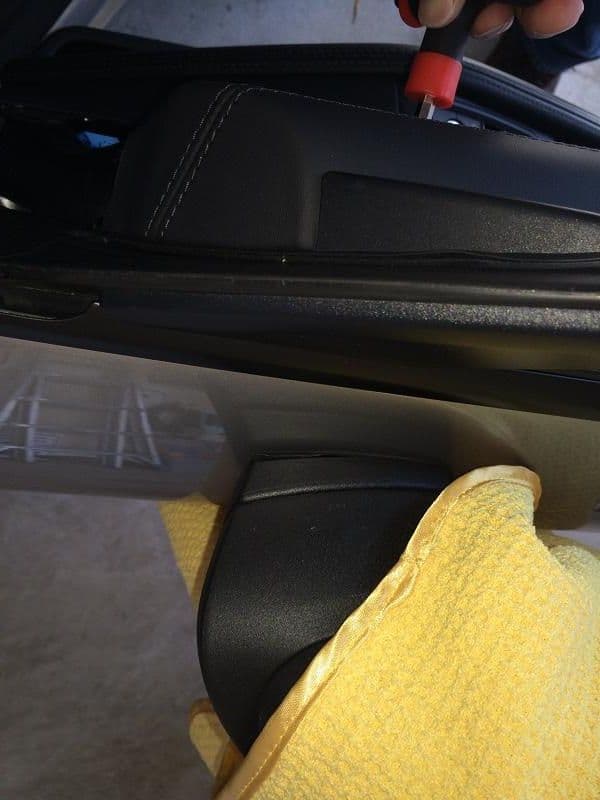
DIY - Porsche 991 911 Side Mirror Removal

(UPDATED:  Added my YouTube video)

Following is a DIY on how to remove the exterior side mirrors from the 991 doors. In my case I have a '14 991 C4S with standard mirrors (NOT Sport Design/GT3 style). I also don't have the power folding option. Not sure how much different the removal steps would be other than perhaps additional wires in the harness...


As I started this project, I was amazed at just how easy it is to get to the single bolt holding the mirror to the door!

Tools required:
  • Torx T-40 with long / extension bar
  • Interior Panel Tools

SAFETY: You shouldn't have anything to worry about with this little DIY, but CYA you can disconnect the negative (-) terminal connection on your battery to be sure that the side door airbag doesn't trigger.... This is a very very remote possibility in this case -- I would be more concerned with this if I were removing the entire door panel!

SHORTCUT:  If you would rather see someone doing the DIY, rather than describing it, check out my YouTube video:


You may also want to put down some towels, other bits to protect any surfaces you are worried about. As always, just take your time, don't force anything (unnecessarily!), and you shouldn't have any worries.

SORRY for the shadows and some blurry pics! car was partially in the sun in my garage, and I was holding my iPhone with one hand.... 

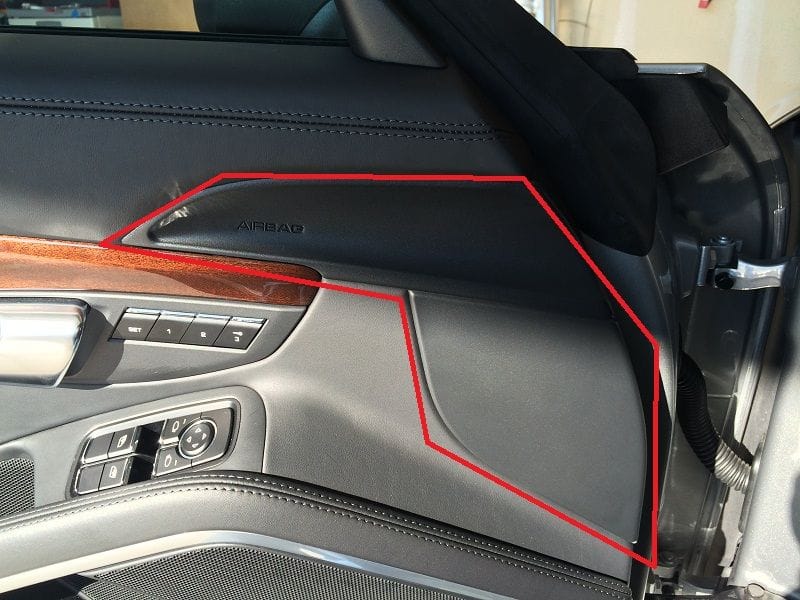
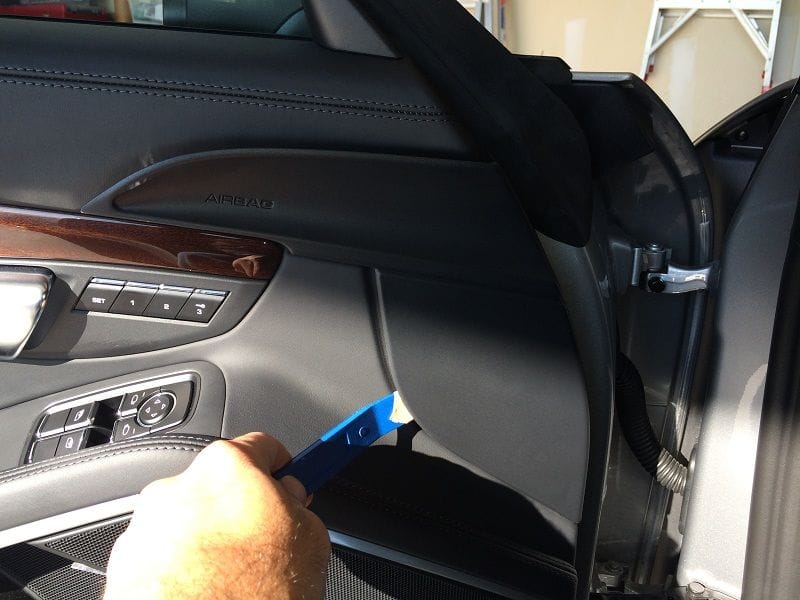
Step 1: Open the door. At the front edge, there are what appear to be two plastic panels - they are actually one large panel - where you see "Airbag". In this pic I've indicated the panel.

Click the image to open in full size.

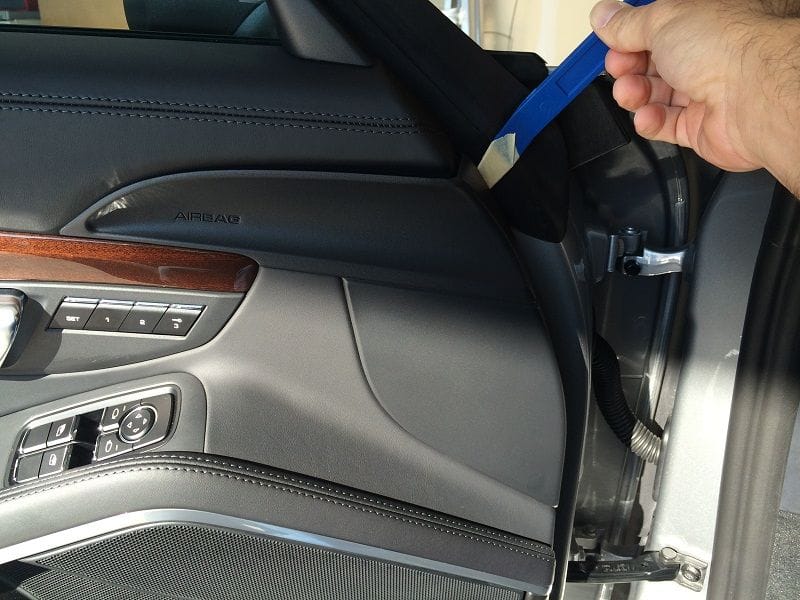
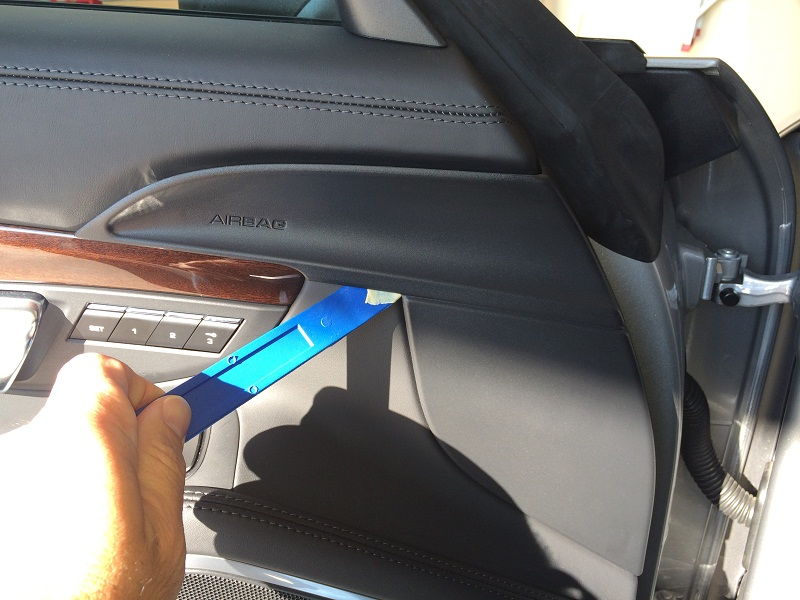
Step 2: Remove the Plastic Panel. Get one of your panel tools -- you could probably do this with your hands only, but I found the tools to be a safe way to go. Start where you see in the picture below, slide your tool edge under the plastic edge where it meets the metal of the door frame, and pry it up from the door. It should "pop" free just a bit.

Click the image to open in full size.

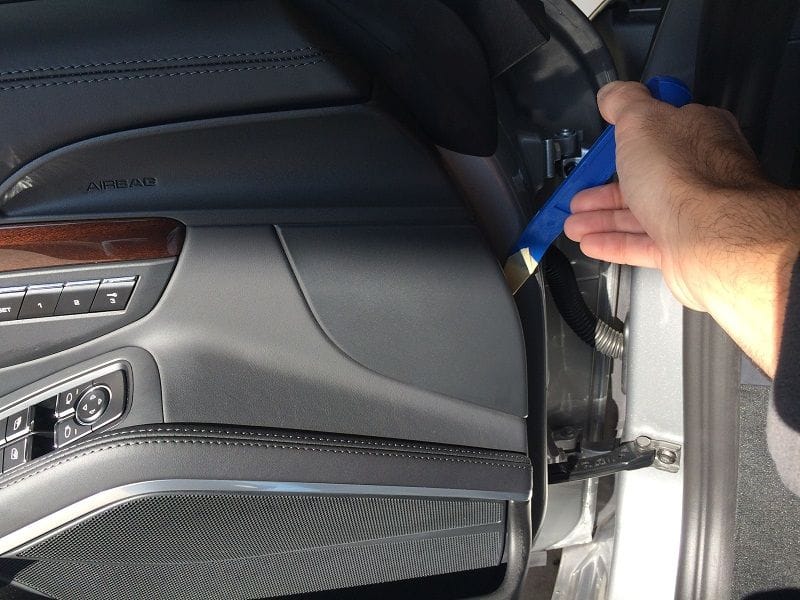
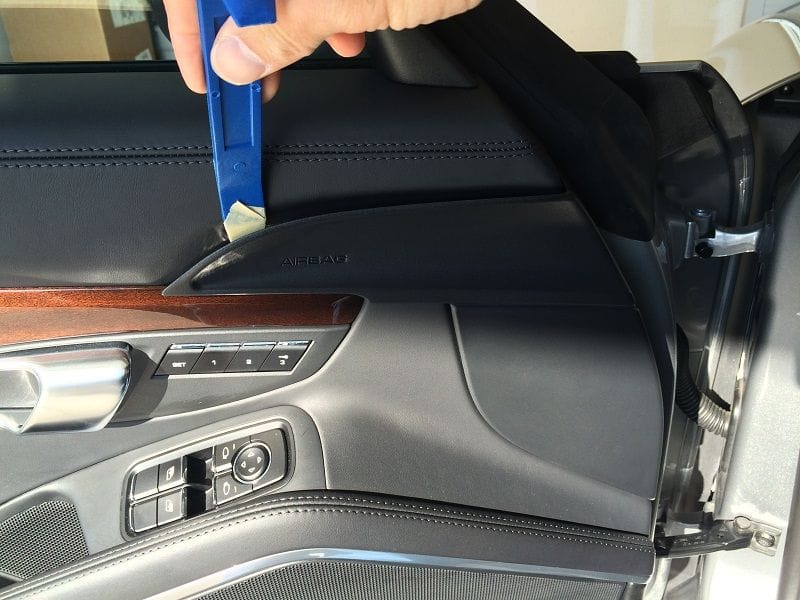
Now follow the pictures in order below to gently pop-free all of the connecting tabs under the panel....

Click the image to open in full size.

Click the image to open in full size.

Click the image to open in full size.

Click the image to open in full size.

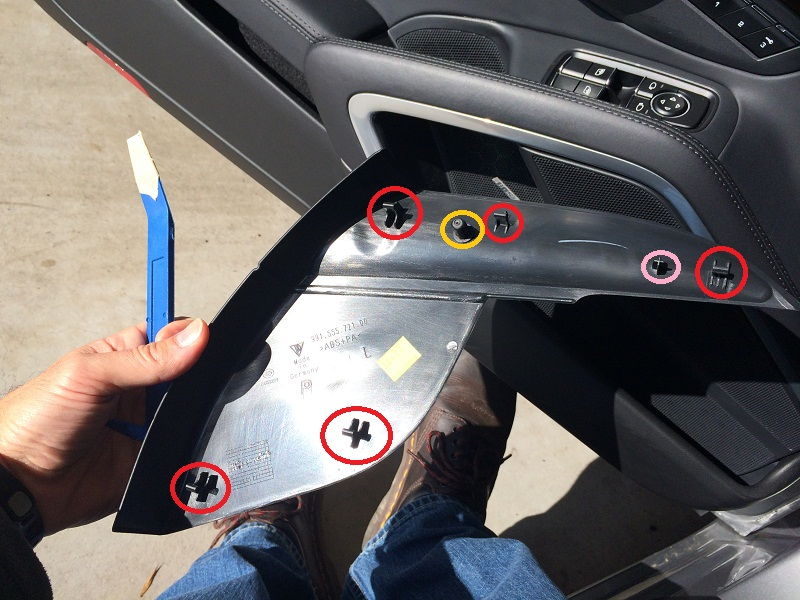
When you get to the last spot around the panel edge, it should just pop-off in your hand. Here is a shot of the rear of the panel, indicating the connecting tabs (red circles).

Click the image to open in full size.

I've also indicated two pins on the rear, in Orange and Pink (what the heck?) circles. These two pins are a bit different, and one has a rubber cover over it that you don't want to lose, or worse, drop in behind the door panel!

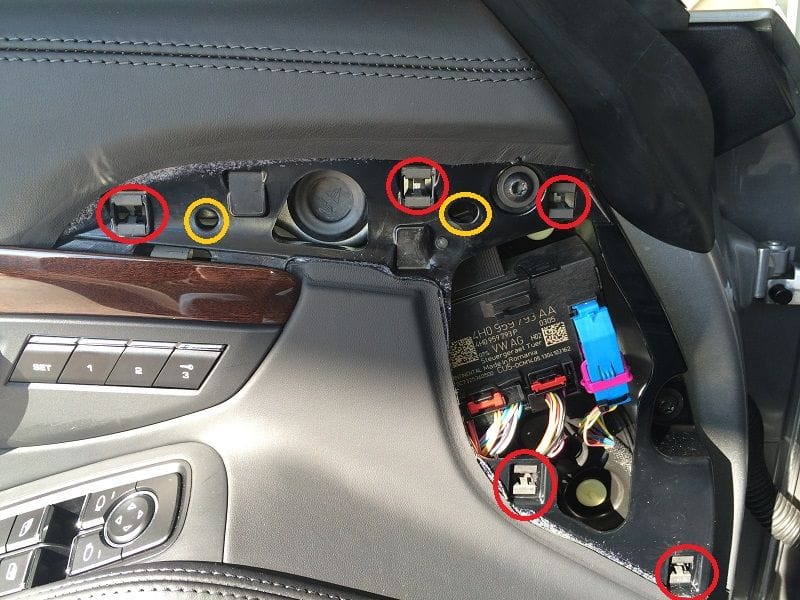
Step 3: Expose Bolt. Now that you have the plastic trim panel removed, look at the door. In the pic below I've first indicated where all the tabs and two pins on the trim piece attach to the door panel...


Click the image to open in full size.

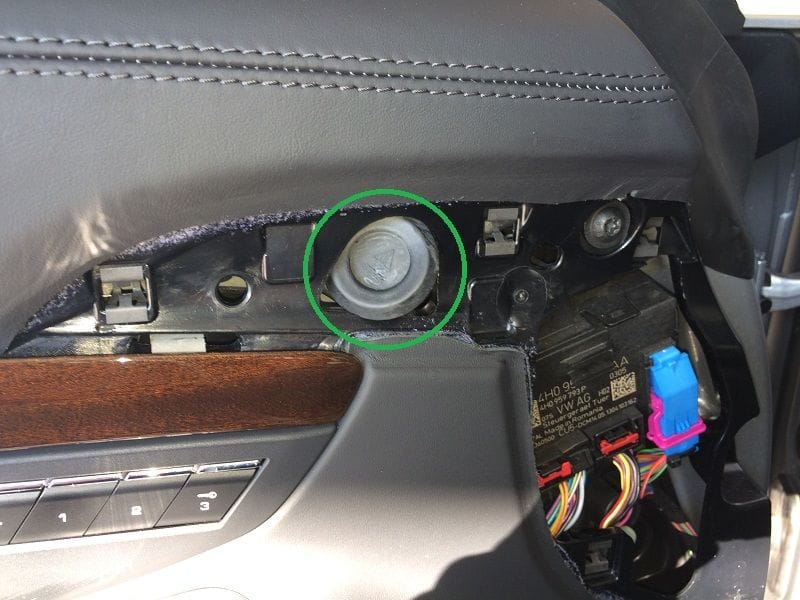
In the center, indicated in this pic, you should see a black rubber plug... circled in green.

Click the image to open in full size.

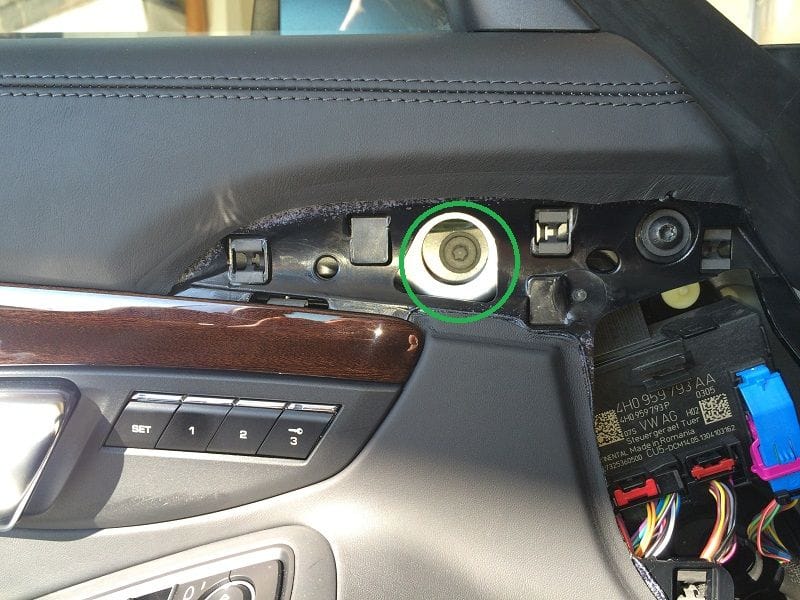
Directly beneath this plug is the bolt holding the mirror to the door. You want to gently pry the plug up and out of the hole. You can use a thin trim tool or something handy to get one edge up, then just pull it out with your fingers. Don't lose this!

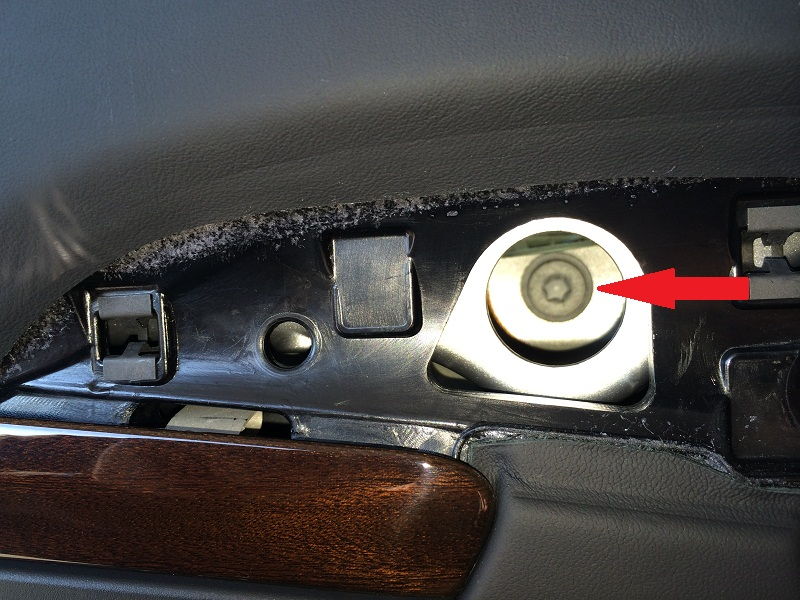
You should now see the opening through which you access the bolt.

Click the image to open in full size.

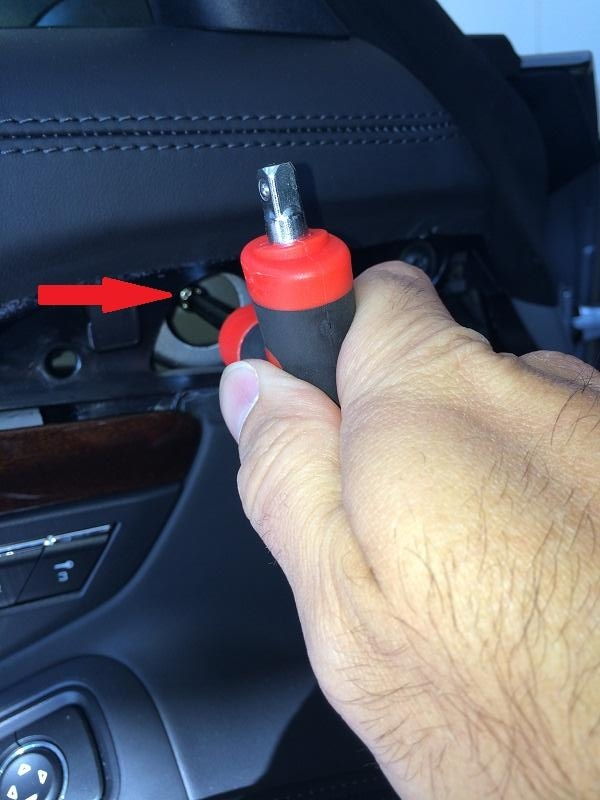
Step 4: Remove the retaining bolt. The bolt is a T-40. You will need an extension of at least 4" or a long handle to reach the bolt. Make sure if you are using a T bit that it is securely held in place in your tool, as you definitely don't want to have it fall out and down into the door! That would suck!

Click the image to open in full size.

Click the image to open in full size.

Before you get the bolt too loose, make sure to put something down on the side of the car to protect the mirror from falling and hitting the side of the car!

Click the image to open in full size.

I found the bolt to be VERY tight. I didn't need a breaker-bar or anything, but took some muscle to loosen. But once I did, the mirror starts releasing from the door as you loosen the bolt.

Click the image to open in full size.

I stopped there. Didn't have time to go any further and take the mirror completely off. I will do that later tonight and post some pics as an edit to this post.

Cheers!

Update:  Some additional details regarding disconnecting the wiring harness so that you can fully remove the mirror from the car...

There is a wiring harness connector that has to be released from the control module that you have to pull out of door when you pull the mirror away from the door surface.  To release the connector, you will have to return to the interior area just below the Airbag trim piece removed previously.

In the following picture, locate the mirror wiring connector in the black control module, just to the left (or right, depending on the door you are facing) of the blue connector -- I've indicated by circling to make it easier....


First, release the electrical connection.  Before you go any further, get a piece of cord, shoelace or similar, and tie one end to the connector that you just released.  You will want this for later, when you need to re-install.

Now, Locate the rubber boot where the wire harness goes through to the outer door shell.  In the pic above I've indicated with red arrows the wire bundle and the rubber boot.  You will have to push it through towards the exterior section of the door, while pulling the mirror up and off the body.  Once you have the mirror far enough out, you can disconnect the wire connector from the cord and leave the cord hanging from the door exterior hole.

The cord will be helpful when you re-install and have to route the wire connector back into the interior door panel.  You should be able to simply tie the end onto the connector and pull it through.  Sorry I don't have a picture of this.

To show you what a mirror looks like when completely removed, I found the following on one of the 991 forums 'for sale' sections.  I've circled the rubber boot and electrical connector for your reference.


Have fun!