991 DIY: Third Brake Light Modification
I am always looking to "tinker" with my toys, and can't leave well enough alone! Hence the following DIY.
I completed the following project about a year ago, never had a chance to post this up, but recent questions by members PorscheCrazy and others reminded me. Maybe someone will find this useful... If you'd like to see a video of the blinking upper brake light in action, jump to the bottom of this post for a link to my YouTube channel GTSilver....
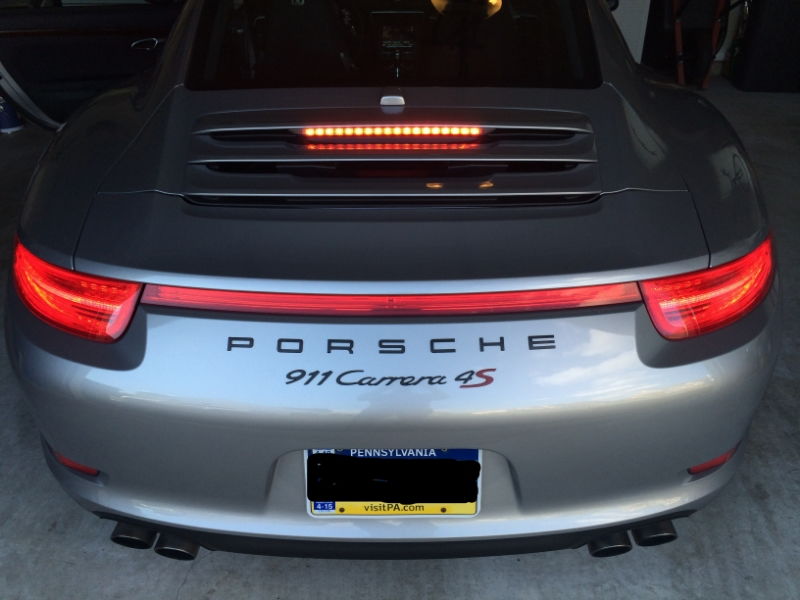
This DIY covers modification to my upper third brake light wiring to alter the LED from a single constant "on" steady state to a blinking light when brakes are applied.
I actually got this idea from a member of a non-6Speedonline Porsche forum that is very popular. ;-)
I had always thought that having a blinking third brake light would be a great safety enhancement, and more so for smaller sports cars. SUV and mini-van drivers don't realize they just can't stop in the same short distance, this is for them or even those tailgaters and morons who love to ride up as close as possible to prove a point or something...
Anyways, I found a small company that produces a controller that when tapped-into your brake light wiring modify from steady to blinking. The company is Kahtec Technologies International. www.kahtec.com This US company produces several products all focused on safety modifications for brake lighting. Someone recently mentioned that there are other products out there -- I do not have any knowledge of them or experience.
I went with the Kahtec "Intelligent" product, which when added claims to flash the third brake light 6 times rapidly when first hitting the brakes, then a steady 3 blinks every 6 seconds for as long you keep your foot on the pedal.
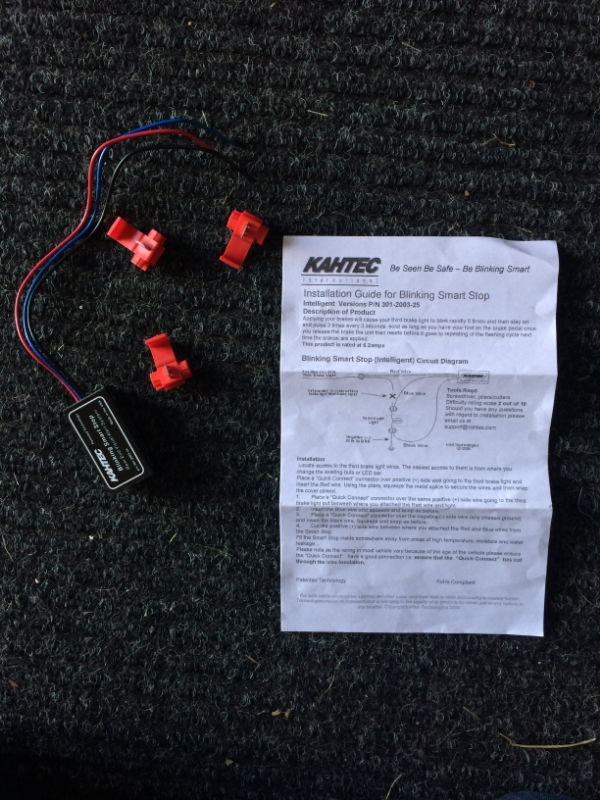
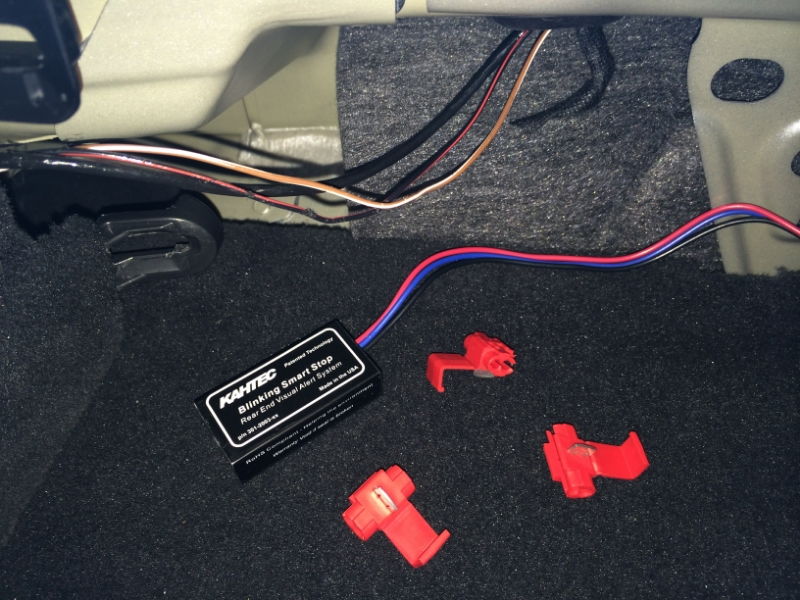
I ordered on the Kahtec web site, and in a couple of days the small box arrived as advertised. The box contained a small wired black box with Red, Black, Blue wires, set of wire taps, and instruction sheet.
The instructions are very clear, easy to read and I felt comfortable that tapping into my wiring would be reversible should I have to switch back. So I set off in search of the best location to grab the wires in my car ('14 C4S coupe). I originally went about pulling the third brake light entirely from the rear vent grill lid (see my other DIY DIY: 991 Upper Third Brake Light Removal but after doing so, decided that there just wasn't a good location back there to mount the Kahtec black box. Also, Kahtec states that the box is NOT weather proof.
So, I recalled locating the wiring harness for the third brake light and antennae bump back when I was wiring my car for the back-up camera. I went back into the interior, passenger side under the back window... I pulled the trim off, and right in front of me was the wiring bundle I needed! It was great not to have to dig and search for wires for once!!
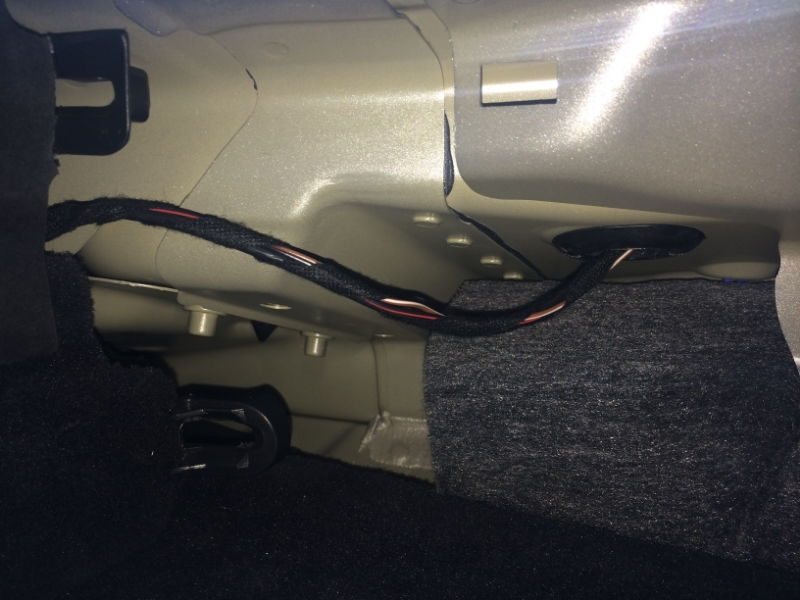
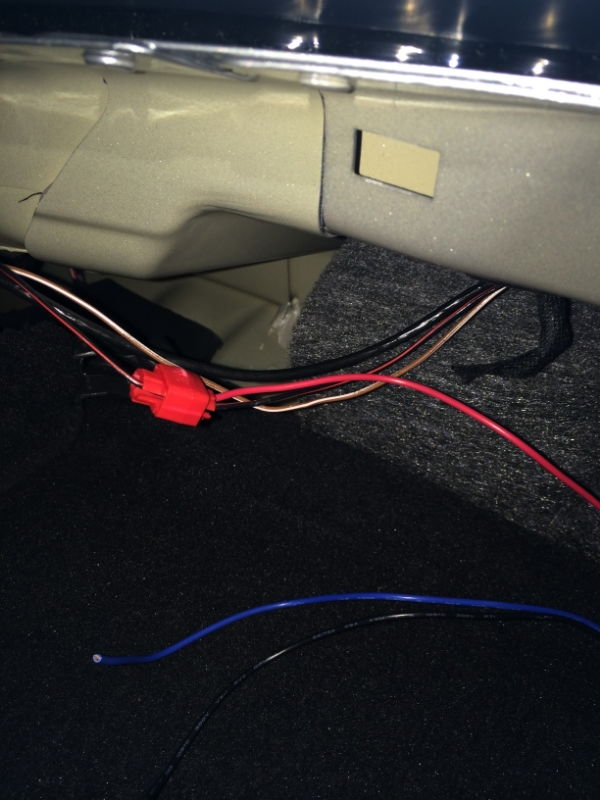
Here's the bundle -- there are three wires. Black/Red, Brown/White, and a larger solid black cable. The cables run from the passenger side of the car up into a rubber grommet (upper right side of pic below), which leads into the trunklid area and up to the grill where the upper third brake light resides.
For reference - in the pic below, LEFT is the passenger-side rear corner under window, RIGHT is near the Sound Symposer opening under the center of the rear window.
You'll need to slit the wrapping-tape to separate the wires...
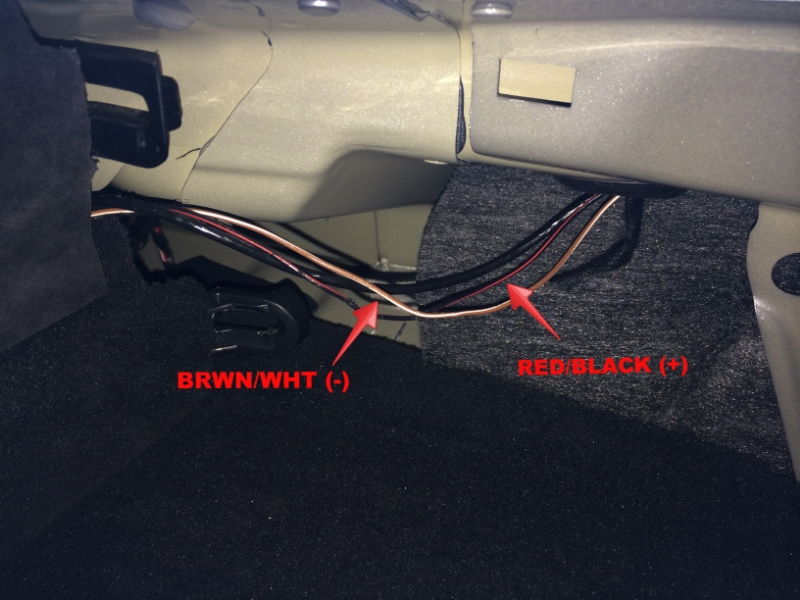
I quickly determined that BLK/RED is power (+) and the BRWN/WHT is ground (-). The solid black cable is for SAT/NAV antennae so I didn't mess with it (hmmm.... what project might I need THAT wire for???).
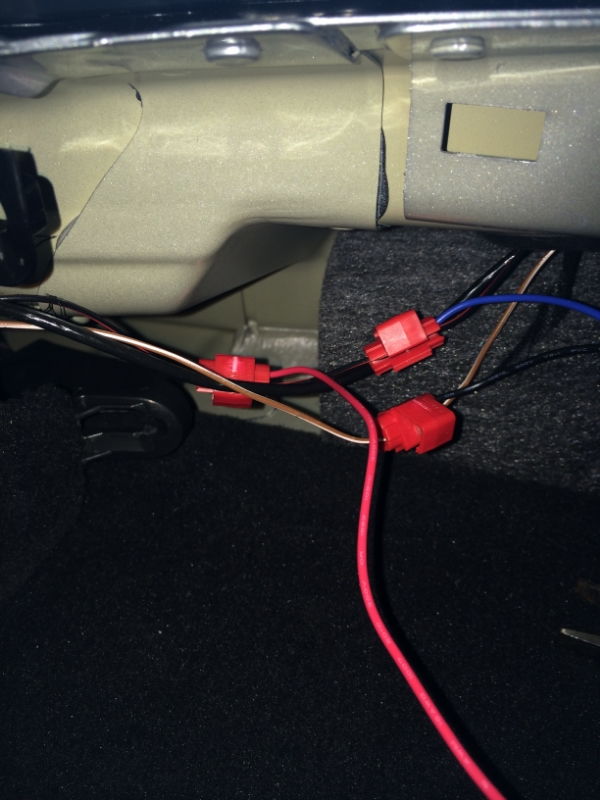
With the wires separated, the next few steps are easy to follow right from the Kahtec instructions included...
Get the Kahtec black box, and the three red plastic wire taps ready. (NOTE: I've since modified the wires further. I don't like using the clamp wire taps, so I went back and replaced with soldered bullet disconnects. Much more reliable, easy to disconnect if necessary, and will maintain a much "cleaner" connection. I'll post some new pics of the modification to the connectors when I get a chance.)
The last very important step? Make sure you follow the directions, and CUT the BLK/RED wire somewhere between the first and second red taps you just added in the steps above. Doing so now causes all power to run through the Kahtec black box to the upper third brake light. If you forget this last step, your brake light will continue to function as normal, without the blinking.
If for some reason you didn't get the wiring correct, you can disconnect the taps and re-try. Try to leave as much wire length as possible in case you need to restore to original state without the module. Also, when using clamp taps, it is possible that you didn't get a clean cut through both wires -- so if you are not getting the module to work, or you get any dash warnings about "third brake light not functioning" you can start your troubleshooting with the clamps.
If you take-on this project, please post your end results and experience here for all to share!
I have a video of the brake light blinking... As well as the removal and setting everything back to "stock". More on that later - but short story is I wanted to return the light to original factory before selling the car.... ;-)
Have fun!
I completed the following project about a year ago, never had a chance to post this up, but recent questions by members PorscheCrazy and others reminded me. Maybe someone will find this useful...
 If you'd like to see a video of the blinking upper brake light in action, jump to the bottom of this post for a link to my YouTube channel GTSilver....
This DIY covers modification to my upper third brake light wiring to alter the LED from a single constant "on" steady state to a blinking light when brakes are applied.
I actually got this idea from a member of a non-6Speedonline Porsche forum that is very popular. ;-)
I had always thought that having a blinking third brake light would be a great safety enhancement, and more so for smaller sports cars. SUV and mini-van drivers don't realize they just can't stop in the same short distance, this is for them or even those tailgaters and morons who love to ride up as close as possible to prove a point or something...

Anyways, I found a small company that produces a controller that when tapped-into your brake light wiring modify from steady to blinking. The company is Kahtec Technologies International. www.kahtec.com This US company produces several products all focused on safety modifications for brake lighting. Someone recently mentioned that there are other products out there -- I do not have any knowledge of them or experience.
I went with the Kahtec "Intelligent" product, which when added claims to flash the third brake light 6 times rapidly when first hitting the brakes, then a steady 3 blinks every 6 seconds for as long you keep your foot on the pedal.
I ordered on the Kahtec web site, and in a couple of days the small box arrived as advertised. The box contained a small wired black box with Red, Black, Blue wires, set of wire taps, and instruction sheet.
The instructions are very clear, easy to read and I felt comfortable that tapping into my wiring would be reversible should I have to switch back. So I set off in search of the best location to grab the wires in my car ('14 C4S coupe). I originally went about pulling the third brake light entirely from the rear vent grill lid (see my other DIY DIY: 991 Upper Third Brake Light Removal but after doing so, decided that there just wasn't a good location back there to mount the Kahtec black box. Also, Kahtec states that the box is NOT weather proof.
So, I recalled locating the wiring harness for the third brake light and antennae bump back when I was wiring my car for the back-up camera. I went back into the interior, passenger side under the back window... I pulled the trim off, and right in front of me was the wiring bundle I needed! It was great not to have to dig and search for wires for once!!
Here's the bundle -- there are three wires. Black/Red, Brown/White, and a larger solid black cable. The cables run from the passenger side of the car up into a rubber grommet (upper right side of pic below), which leads into the trunklid area and up to the grill where the upper third brake light resides.
For reference - in the pic below, LEFT is the passenger-side rear corner under window, RIGHT is near the Sound Symposer opening under the center of the rear window.
You'll need to slit the wrapping-tape to separate the wires...
I quickly determined that BLK/RED is power (+) and the BRWN/WHT is ground (-). The solid black cable is for SAT/NAV antennae so I didn't mess with it (hmmm.... what project might I need THAT wire for???).
With the wires separated, the next few steps are easy to follow right from the Kahtec instructions included...
Get the Kahtec black box, and the three red plastic wire taps ready. (NOTE: I've since modified the wires further. I don't like using the clamp wire taps, so I went back and replaced with soldered bullet disconnects. Much more reliable, easy to disconnect if necessary, and will maintain a much "cleaner" connection. I'll post some new pics of the modification to the connectors when I get a chance.)
- Hold the BLK/RED wire, pull it into the red wire tap.
- Take the RED wire from the Kahtec black box and push it into the red wire clamp.
- Clamp down on the red tap until you hear it "snap" and use a pair of pliers to make sure you've pushed through both wires.
- Now take hold of the BLK/RED wire about an inch away from the tap you just installed, and push the wire into another red wire tap.
- Take the BLUE wire from the Kahtec black box and push the end into the red wire tap.
- Clamp down to complete the splice connection.
- Take the third red tap, and holding the BRWN/WHT wire push it into the tap.
- Take the BLACK wire from the Kahtec box and push it into the red tap and clamp down.
The last very important step? Make sure you follow the directions, and CUT the BLK/RED wire somewhere between the first and second red taps you just added in the steps above. Doing so now causes all power to run through the Kahtec black box to the upper third brake light. If you forget this last step, your brake light will continue to function as normal, without the blinking.
If for some reason you didn't get the wiring correct, you can disconnect the taps and re-try. Try to leave as much wire length as possible in case you need to restore to original state without the module. Also, when using clamp taps, it is possible that you didn't get a clean cut through both wires -- so if you are not getting the module to work, or you get any dash warnings about "third brake light not functioning" you can start your troubleshooting with the clamps.
If you take-on this project, please post your end results and experience here for all to share!
I have a video of the brake light blinking... As well as the removal and setting everything back to "stock". More on that later - but short story is I wanted to return the light to original factory before selling the car.... ;-)
Have fun!
No comments:
Post a Comment